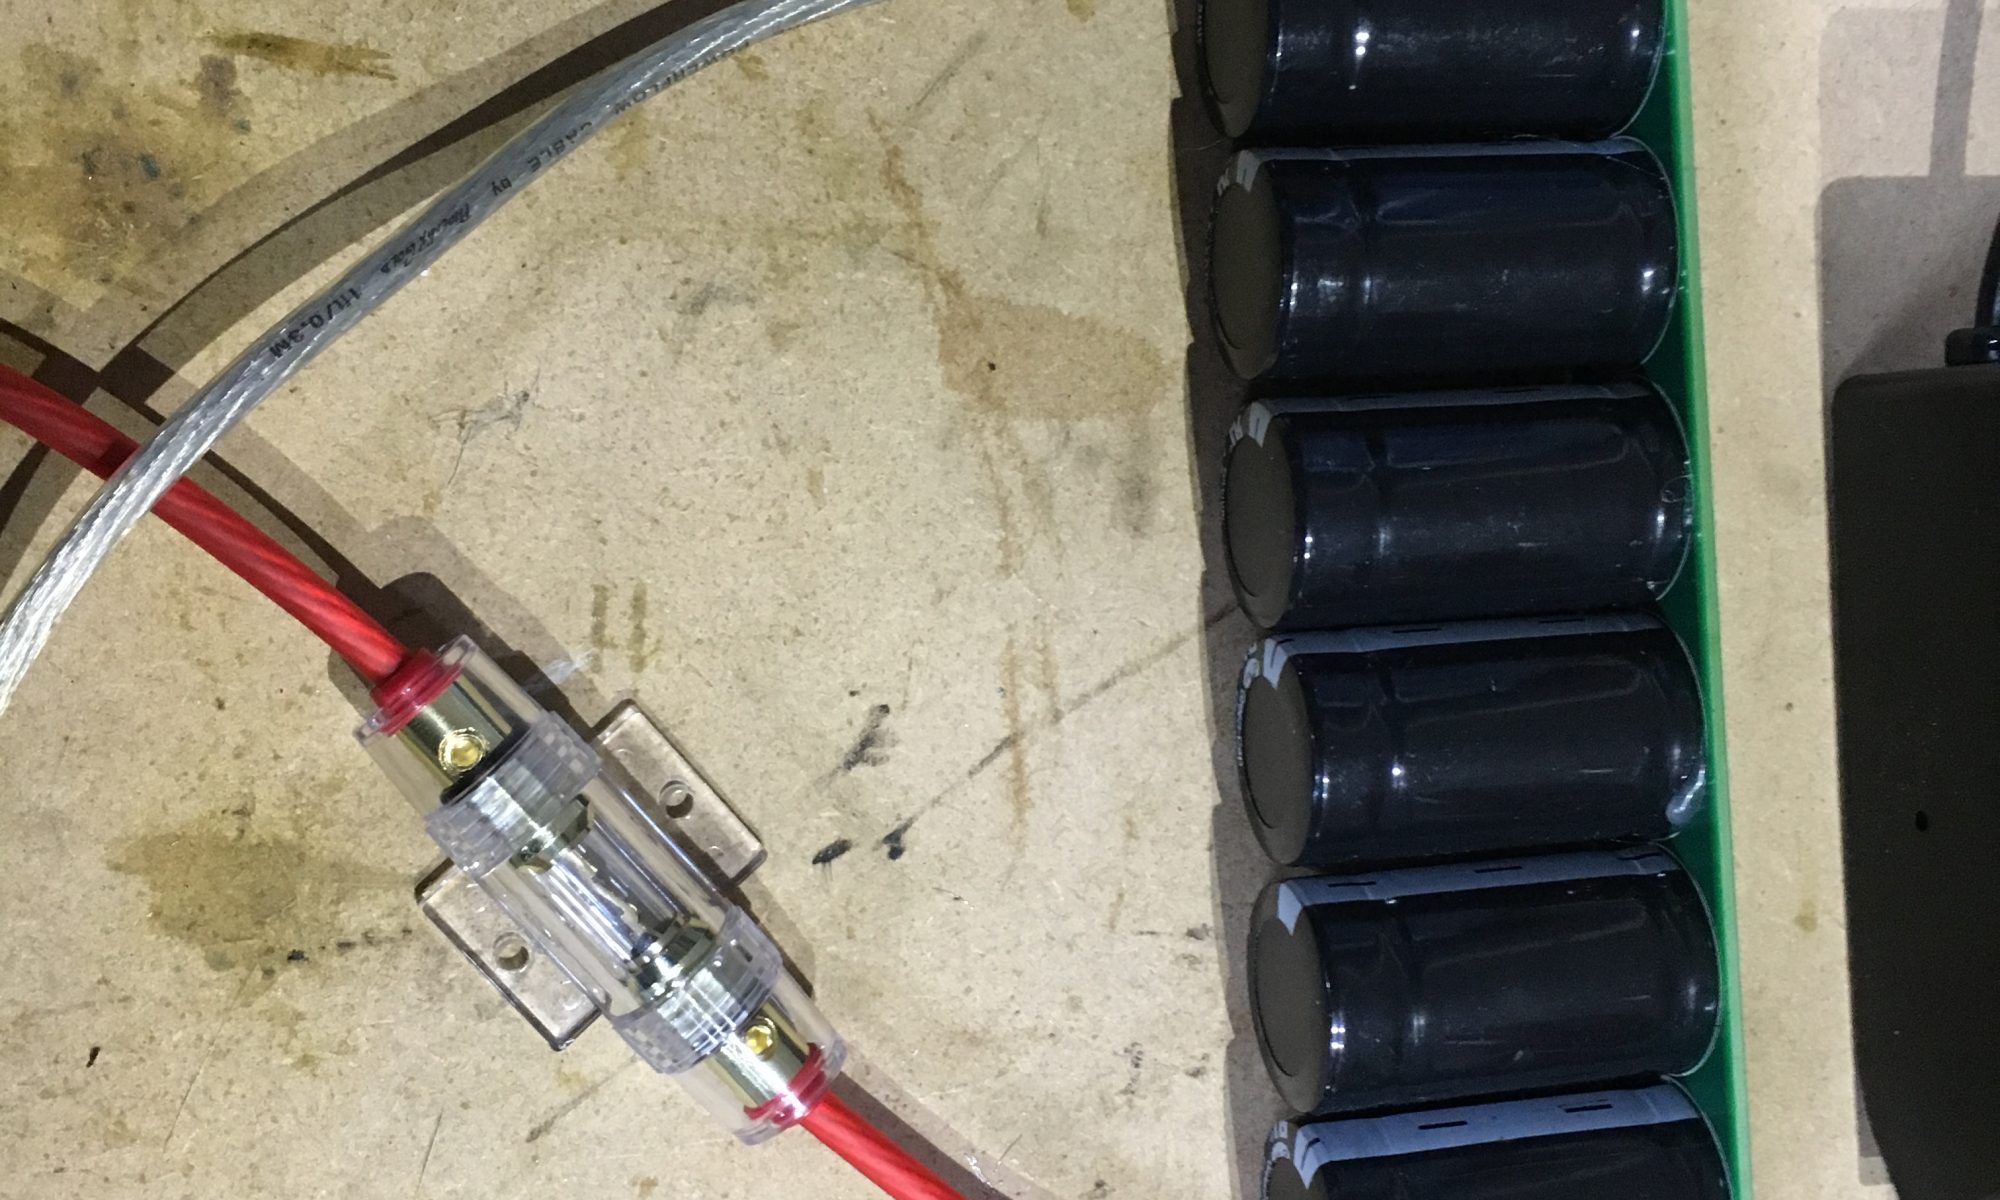
Welcome

Welcome to my digital home! There are lots of articles you might find helpful buried in this site on topics such as modifying an Alfa Romeo 159, rebuilding a Lotus 7 (Robin Hood 2B), not to mention a ton of stuff on technology in general. It’s all here somewhere, so use the search function or navigate using the menu structure. if you want to talk, reach out via the contact function, I usually do answer!

Random Post Selection
GeneralWell, its been a while, but after nearly a full year of ownership I thought I would share my thoughts…….. I bought a pair of Rokit RP6G2 Limited Edition (Yellow) Speakers nearly a year ago now and after a lot of use I can confirm they are truly an awesome sounding set of speakers. The honesty of the reproduction is not sacrificed to provide a “decent” sound from multiple digital sources. In fact, they sound just as good playing an Mp3 encoded at 192Kbps as they do outputting a raw track from Ableton, yet do not loose the accuracy or quality required to pick out the levels and sound scape….. truly an accomplishment. The acoustics of your room is of course a variable…. I had them initially in a small room and that increased the low frequency response ten fold, vs now, when I have them in a much larger room, where the bass is sacrificed somewhat, but not to the extent that its a problem I might add. If money was no object (and they are on my Christmas list), the icing on the cake for these speakers is clearly a KRK 10S and the acclaimed ERGO system. The addition of these items would make the overall sound from this configuration truly something to be reckoned with. Related Images: [...]
LiveMixesAnother Progressive Mix for 2010: Stefano Noferini – Cool Summer (Original Dirty Mix) + hardrive Deep Inside (Harry Choo Choo Romero Bambossa Remix) Laidback Luke, Sebastian Ingrosso, Axwell, Steve Angelo feat. Deborah Cox – Leave The World Behind (Original Mix) Moguai – Lyve (Original Mix) Pryda – Miami To Atlanta (Original Mix) Moguai – Imperial (Original Mix) Sebastian Ingrosso – Kidsos (original Mix) Young Rebels & Francesco Diaz – 1998 (Original Mix) Yeah Yeah Yeahs – Heads Will Roll (A-Track Remix) (Club Edit) Jerry Ropero, Tom Novy Feat. Abigai Bailey – Touch Me (Extended Mix) Cirez D – On Off (original Mix) Depeche Mode – Hole to Feed (Proof Vocal Mix) Deadmau5 Feat Billy Newton – Outta My Life (Touch Mix) Hoxton Whores – Devil Toy (Original Club Mix) Wolfgang Gartner – Flashback (Original Mix) Fedde Le Grand – Praise You (Fatboy Slim Vs. Fedde le Grand Remix Remix) Jerome Isma-Ae – Hold That Sucker Down (Original Mix) Pacific Wave – 1998 (Dj Phunk & 3Am Mix) https://jabawoki.com/wp-content/mp3/Jabawoki_DeepDivin_25032010.mp3 Podcast: Play in new window | Download Related Images: [...]
LiveMixesMore Progressive sounds for Easter….. Fatboy Slim vs Koen Grownwvald – Rackafeller Skank (Original Mix) Felix Baumgartner & Juan Kidd – Now Your Gone (Club Mix) David Penn & Rober Gaez – Our Darkness (Original Mix) Funkagenda – Breakwater (EDX Ibiza Sunrise Mix) Milk & Sugar – Let the Sunshine (Milk & Sugar Global Mix) Paul Gardner & Hugh Gunnell ft Marcella Woods – Come Get My Lovin (Plastik Funk Remix) Faithless – Music Matters (Mark Knight Remix) Sandy Rivera – Whatever (Andy Daniell Digital Edit) Ou Est Le Swimming Pool – Dance The Way I Feel (Armand Van Helden Club Mix) Richard Grey – One More Time (Chris Moody Remix) Kim Fai – Good Life (Original Mix) TV Rock – In the Air (Axwell Remix) Young Rebels & Fransico Diaz – 1998 (Original Mix) Funkagenda – Nobody Listens To Techno Feat. Mc Flipside (Original Mix) Muzzaik – Going Underground (Original Mix) DCA Project – Sandcastles (John Dahlback Remix) Pryda – Waves (Original Mix) Dankann – Genesis (Original Mix) https://jabawoki.com/wp-content/mp3/Jabawoki_Easter_Progressive_06042010.mp3 Podcast: Play in new window | Download Related Images: [...]
Alfa 159 / ElectronicsWell, I continue to work on this and now have a beta unit in my car on a long term test. It is pretty rough around the edges and has one major(ish) issue that I am working to resolve, but its a good starting point to work from. So what I have now looks a bit like this: (click to enlarge) Its still a very simple design that uses as few components as I can, but as a result it has some issues: As the the LEDs are quite hungry (50Ma each) the ATMega328 & the voltage regulator has to work hard to feed them. The above point causes a small delay in start-up of the unit of around 200-300ms. This delay is a problem as the unit is powered by the feed to the brake light, when the brake is pressed, so in essence it adds a small delay between the stop/tail lights of the car illuminating and the high level brake light. Long term this is unacceptable, but for now its a work in progress so I can live with it. The first generation PCB was designed to fit into the dust cover of the brake light, but after I attached the ribbon cables for the LED’s it didn’t fit so is now wedged under the parcel shelf for now. This gives me easy access form the boot to change the unit as I progress the design to remove the delay and make it instant. Here is the mock-up of the PCB using matrix board (left to right we have the finished design, the component layer, the jumper cable layer on the front, and the soldered join layer on the back):        And the finished article looked like this: In the end I decided to opt to hot glue the LED’s into the reflector and wire them back via a ribbon cable to allow me more flexibility on changing the circuits easily: Long term I intend to make a unit that can replace the original light bar, so the LEDs will be mounted direct to a PCB that will be installed into the light bar in some way, or easily attached to the back of the reflector housing, not sure which yet. I am working on a number of new designs at the minute that remove the delay and am getting some help from a true expert in the field of automotive electronics who actually designed stuff  that is used in the Mclaren MP4-12C. The current V3 unit that is in the car looks like this when operated: You can download all of the project files (sketch, layout & schematic) from the downloads section. Watch this space for V4 of the unit. Related Images: [...]
Alfa 159This post covers the interior lighting modifications made to my 2008 Alfa Romeo 159 TI.For the exterior LED conversion guide, click here. This modification is worth completing as a single project as the results are a dramatic change in the mood of the interior of the car at night. The original filament bulbs are very yellow so choosing a good LED that puts out a colour range around 6000K changes the feel of the car to a much cooler, relaxed and crisp feel.The parts required to complete this conversion are as follows: 7 x w5w / 501 Type bulbs (all CANBUS) (Puddles, Maps & Glove box) 2 x 42mm FESTOON type bulbs (CANBUS) (Cabin & Boot) Expected Cost: £35-40 Required Tools: One Bojo trim removal kit “Bojo Bars” (£30) …or a few screwdrivers and a steady hand! I personally used two of these Festoon type bulbs for the courtesy lights in the front of the car and the boot and four of these 501 type bulbs for the rest of the courtesy & map lights in the front and rear of the car. These were a good balance of brightness and colour, and matched well as I did not want to flood-light the car at night. For the puddle lights and the glove-box I wanted more light so I chose these 501 type bulbs that provided much more light output than the other ones, as these were areas of the conversion that would benefit from more light output. It is important to understand that the bulbs you use must be CANBUS ready. What this means is that the LEDs have additional resistance added to them that simulates the load of a normal filament bulb so that the cars internal computers do not think that the bulbs are blown. This is due to the fact that modern cars put a small electrical current across the lighting circuits to check that the bulb has not blown, and to report an error if it has, so you know to fix it. While the interior lights don’t report the errors, the circuit still has a small electrical current across it, so if you do not use CANBUS friendly bulbs you will find that some of the lights never turn off and instead stay illuminated (all be it quite dimly) forever! Here are some images taken from an iPhone, which explains why they look very dark. Its not actually dark at all!    The following expanding links give you the specific guides for each light unit to perform this upgrade yourself:   The front courtesy light is a single unit with several components in it including switches, alarm sensors and the B&M microphone so care is required when replacing the bulbs. The unit itself is held in place with a series of clips down each side that hold it against the roof lining (1a in diagram). You will need 1 x 42mm Festoon bulb (1 in diagram) and 2 x 501 bulbs (2c in diagram) to upgrade this component, below is the removal guide from eLearn: Like the front courtesy light, this unit is held against the roof lining by a series of clips (1a in diagram). care must again be exercised so as not to damage the unit during removal. You will need 2 x 501 type bulbs (1c in diagram) for this light unit. Below is the removal guide from eLearn: The puddle lights are located in the base of each front door and provide illumination of the ground when the doors open. They are held in place using a simple clip mechanism (1b in diagram) and are a self contained plastic unit which the bulb sits inside. You will need 2 x 501 type bulbs (1c in diagram) to complete both doors. The guide below from eLearn shows how to remove the units: The glove box makes use of the same style bulb holder as the puddle lights and requires a single 501 type bulb (2 in diagram). The eLearn guide below shows how to remove it: The boot light makes use of the final 42mm Festoon bulb (4b in diagram) and is located behind a simple clip on housing (1c & 1b in diagram). The eLearn guide below shows how to remove this: Related Images: [...]
LiveMixesOldschool Hard House from the archives https://jabawoki.com/wp-content/mp3/Jabawoki_06052002_HardTrance.mp3 Podcast: Play in new window | Download Related Images: [...]
RH2B Build DiaryAfter first getting into the Hoody, I realised that I would have to modify the steering column mounting position as I was just too big for the seating position that had been set by the original builder. Factor in the new seats and the larger steering wheel, and this became pretty critical to me being able to drive it again! The steering wheel mounted to a steel plate hung off a chassis cross member, with a brace bar back to a side chassis rail. Moving it was as simple as drilling some new M10 holes in that mount point a little higher up, and then attacking a lot of metal with a die grinder until I had sufficient clearance to get the column up an inch! A little more leg room. Its often the easiest of changes that have the biggest impact. For instance being able to take your foot off the clutch while turning a corner seemed pretty useful to me 🙂 ready to grind! One issue I found was that due to the mk1 centre clocks, I was unable to engage main beam anymore (left stalk pushed forward), however this is a temporary issue as I intend to design and 3dprint a new stalk that has an extra long bend in the middle to gain me the additional half an inch of clearance I need to get that function back. The future is now! Related Images: [...]
LiveMixesIts been a long time coming, but here it is… a fresh mix on a totally new rig, so excuse the flaky mixing 🙂 https://jabawoki.com/wp-content/mp3/Jabawoki_Rolling_House_Beats_15082009.mp3 Podcast: Play in new window | Download Related Images: [...]
Generalok, I have had an X25 deck stand for years now, and it is actually quite good. Its stable and well put together, and of course, holds enough of the basic equipment to keep you up and running. Of course, as I expand my setup, I have come to basic realisation that what I need, is actually a simple flat surface. So me, being me, I opened up visio and knocked this up: ….essentially  it is 2 sheets of 8ft x 4ft, 3/4″ mdf cut into a number of shapes and sizes, screwed togetehr resulting in two vertical podiums, each wide enough to take a 19″ rack mount perfectley, and a worksurface 2meters by 750mm, big enough for plenty of equipment. the whole thing stands 600mm high, which is the same height as your kitchen sink! so its ideal to stan infront of for long periods of time. If anyone is interested I’ll post up the 2 x cutting guides for the mdf sheets so that you can make your own. To put it into perspective. you can buy somthing similar, but inferior at www.htfr.com for well in excess of £130. The total cost for my version, which is bigger and better, is £30, yes 2 x sheets of mdf from B&Q at £15 per sheet. for the sake of an afternoons work, i know which one i would do! Related Images: [...]
Alfa 159Once the car was pepped and ready it was onto the enclosure build. This was a combination of trial and error mixed with some loose  calculations and estimations around box size. I had worked out utilising box design software that  for my sub, a 0.6 cuft sealed enclosure was going to give me good responsive SQ and enough power. This also suited my limited boot incursion requirements so was ideal. I also wanted the amp to be located as part of the enclosure and with the heat-sink visible to aid in cooling. The end result was to have something that looked as close to built by designed as I could achieve without a lot of fibreglass and pain! ” order_by=”sortorder” order_direction=”ASC” returns=”included” maximum_entity_count=”500″]   Related Images: [...]

Related Images:

Related Images: