This post covers the interior lighting modifications made to my 2008 Alfa Romeo 159 TI.For the exterior LED conversion guide, click here. This modification is worth completing as a single project as the results are a dramatic change in the mood of the interior of the car at night. The original filament bulbs are very yellow so choosing a good LED that puts out a colour range around 6000K changes the feel of the car to a much cooler, relaxed and crisp feel.The parts required to complete this conversion are as follows:
- 7 x w5w / 501 Type bulbs (all CANBUS) (Puddles, Maps & Glove box)
- 2 x 42mm FESTOON type bulbs (CANBUS) (Cabin & Boot)
Expected Cost: £35-40
Required Tools: One Bojo trim removal kit “Bojo Bars” (£30) …or a few screwdrivers and a steady hand!
I personally used two of these Festoon type bulbs for the courtesy lights in the front of the car and the boot and four of these 501 type bulbs for the rest of the courtesy & map lights in the front and rear of the car. These were a good balance of brightness and colour, and matched well as I did not want to flood-light the car at night. For the puddle lights and the glove-box I wanted more light so I chose these 501 type bulbs that provided much more light output than the other ones, as these were areas of the conversion that would benefit from more light output.
It is important to understand that the bulbs you use must be CANBUS ready. What this means is that the LEDs have additional resistance added to them that simulates the load of a normal filament bulb so that the cars internal computers do not think that the bulbs are blown. This is due to the fact that modern cars put a small electrical current across the lighting circuits to check that the bulb has not blown, and to report an error if it has, so you know to fix it. While the interior lights don’t report the errors, the circuit still has a small electrical current across it, so if you do not use CANBUS friendly bulbs you will find that some of the lights never turn off and instead stay illuminated (all be it quite dimly) forever!
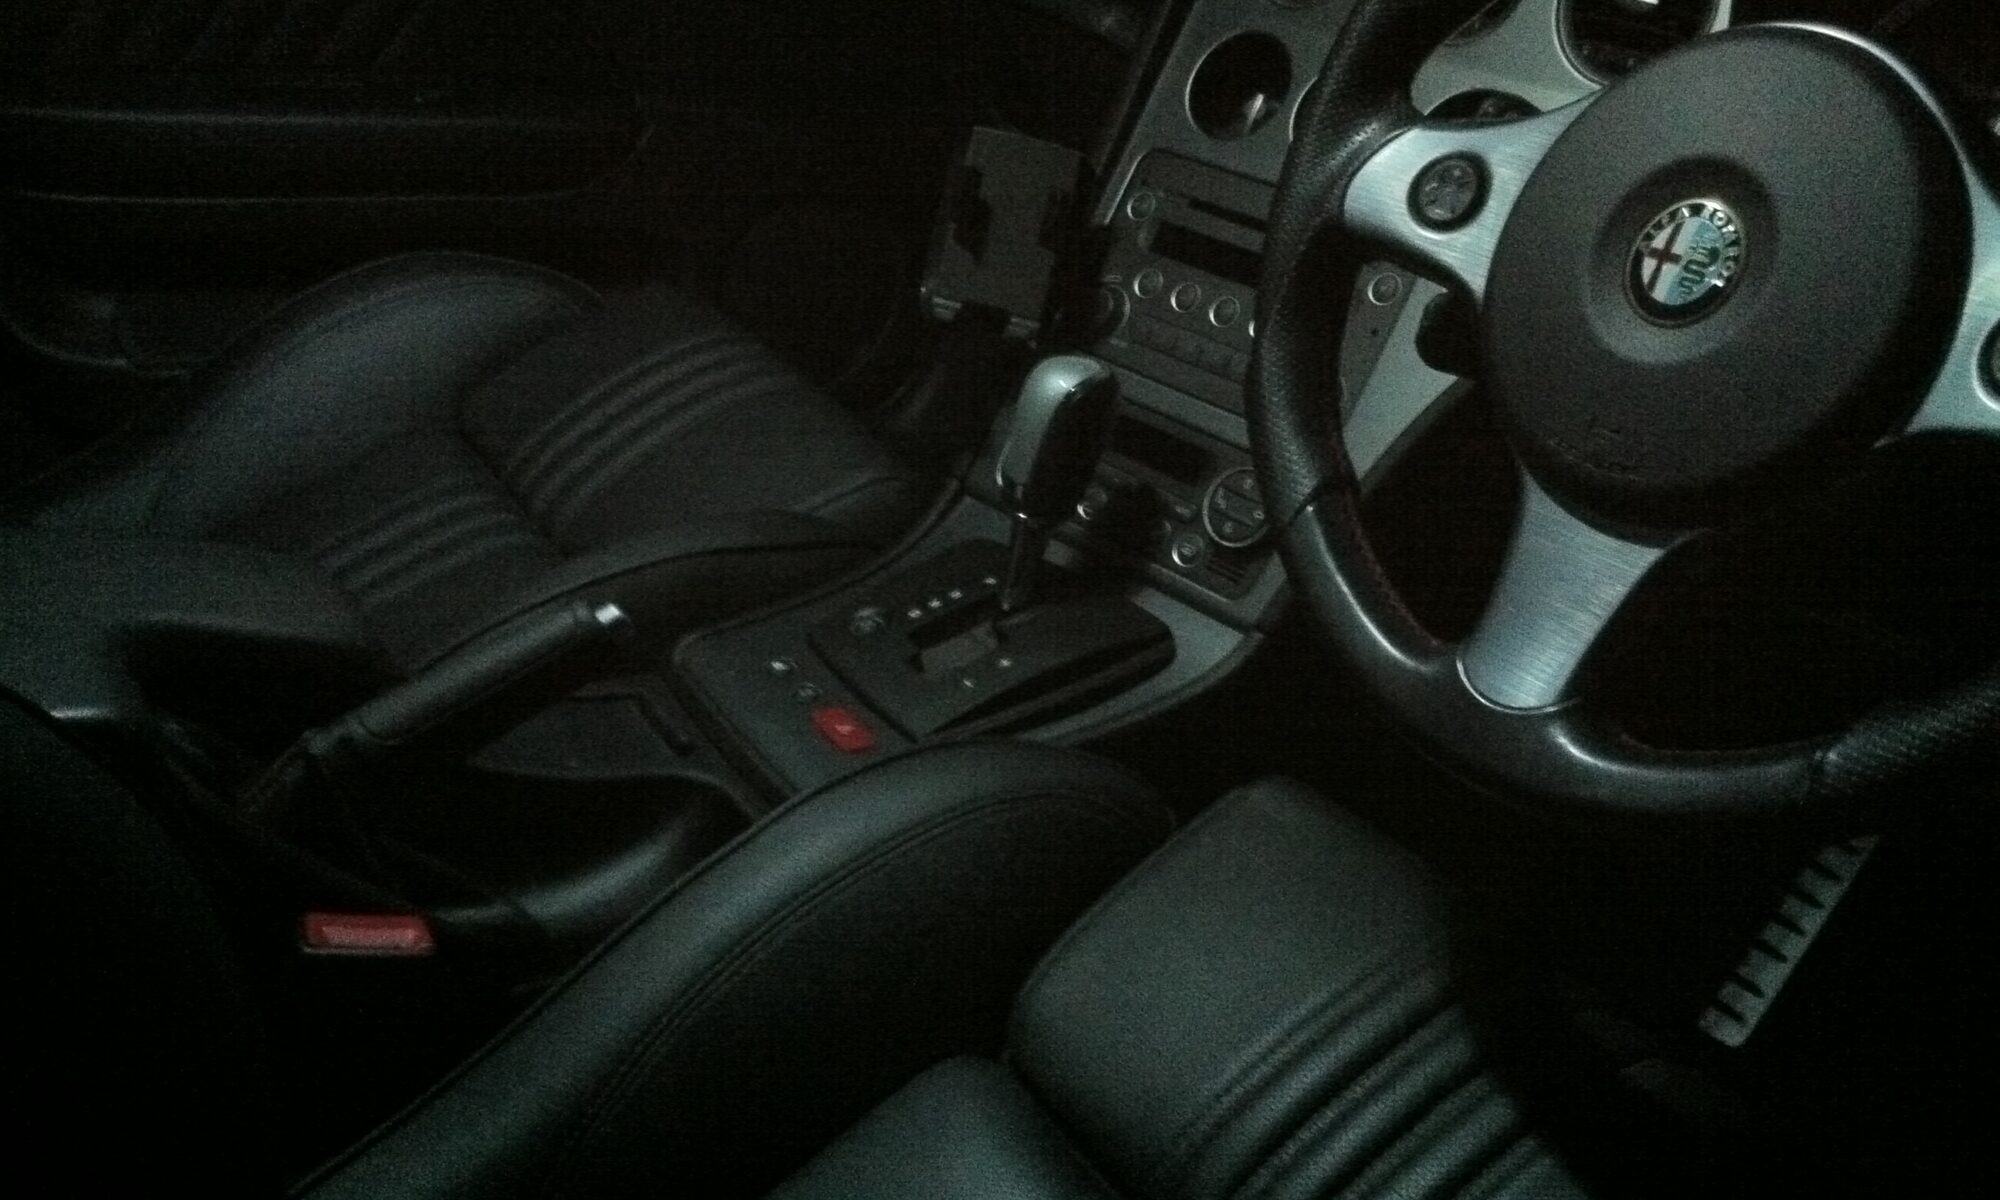
Here are some images taken from an iPhone, which explains why they look very dark. Its not actually dark at all!
The following expanding links give you the specific guides for each light unit to perform this upgrade yourself:
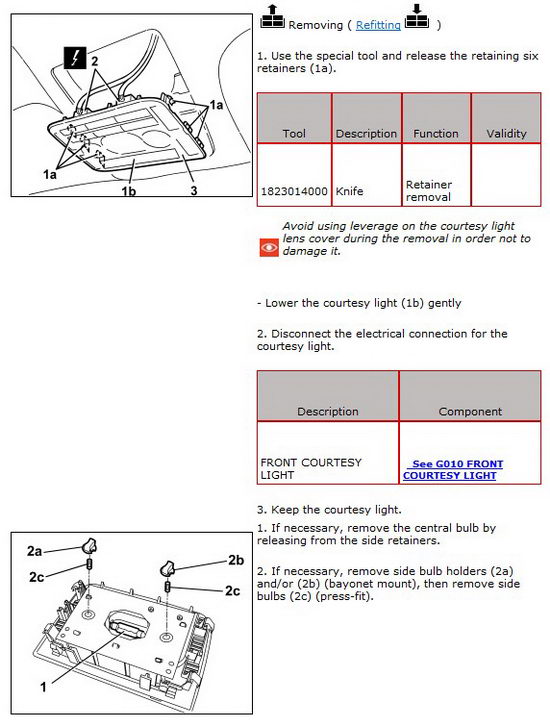
The front courtesy light is a single unit with several components in it including switches, alarm sensors and the B&M microphone so care is required when replacing the bulbs. The unit itself is held in place with a series of clips down each side that hold it against the roof lining (1a in diagram). You will need 1 x 42mm Festoon bulb (1 in diagram) and 2 x 501 bulbs (2c in diagram) to upgrade this component, below is the removal guide from eLearn:
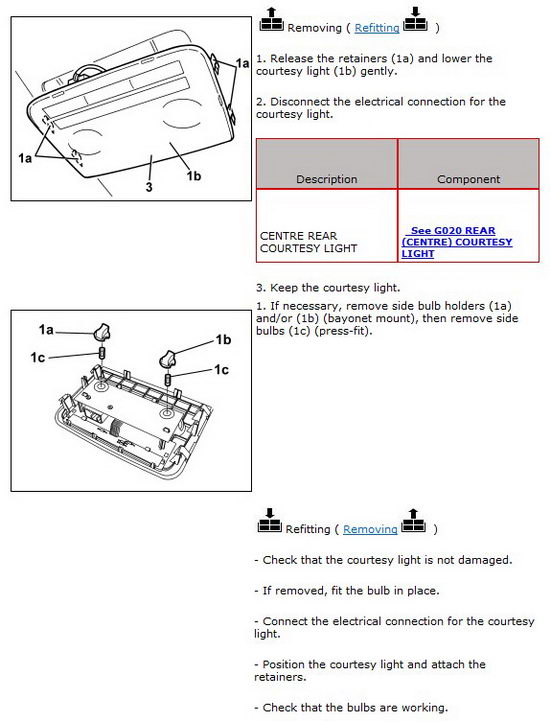
Like the front courtesy light, this unit is held against the roof lining by a series of clips (1a in diagram). care must again be exercised so as not to damage the unit during removal. You will need 2 x 501 type bulbs (1c in diagram) for this light unit. Below is the removal guide from eLearn:
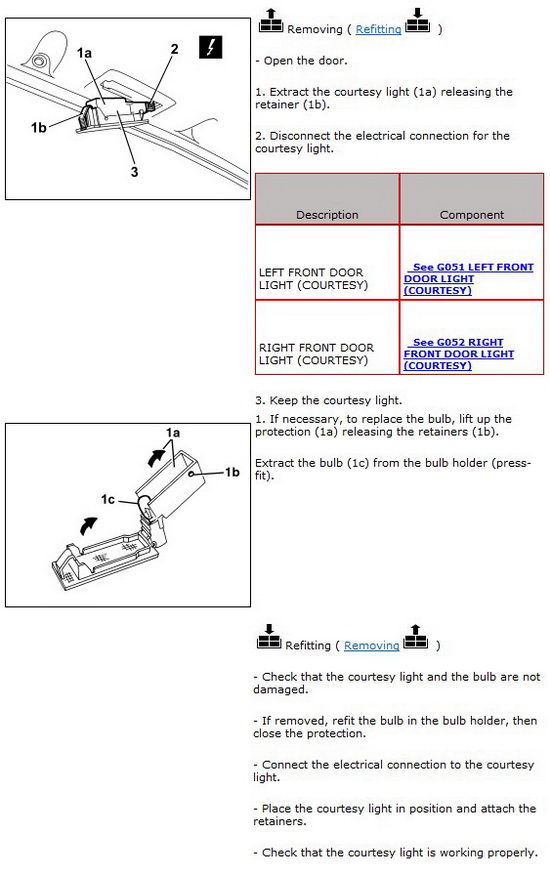
The puddle lights are located in the base of each front door and provide illumination of the ground when the doors open. They are held in place using a simple clip mechanism (1b in diagram) and are a self contained plastic unit which the bulb sits inside. You will need 2 x 501 type bulbs (1c in diagram) to complete both doors. The guide below from eLearn shows how to remove the units:
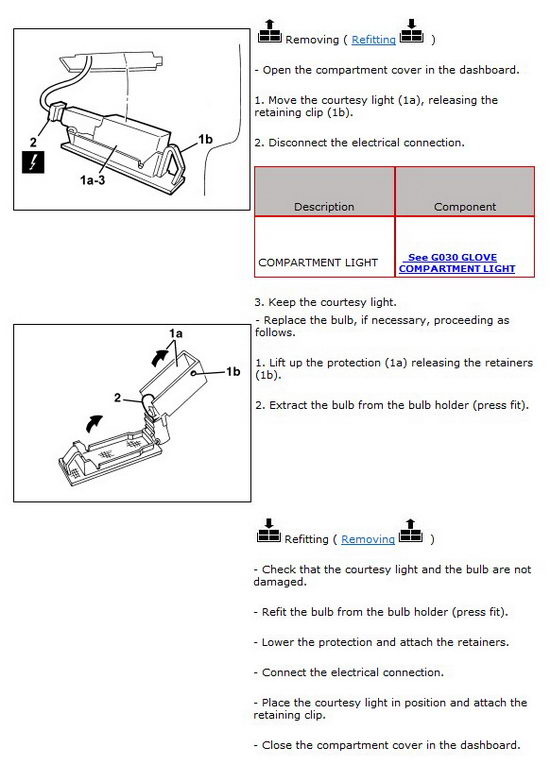
The glove box makes use of the same style bulb holder as the puddle lights and requires a single 501 type bulb (2 in diagram). The eLearn guide below shows how to remove it:
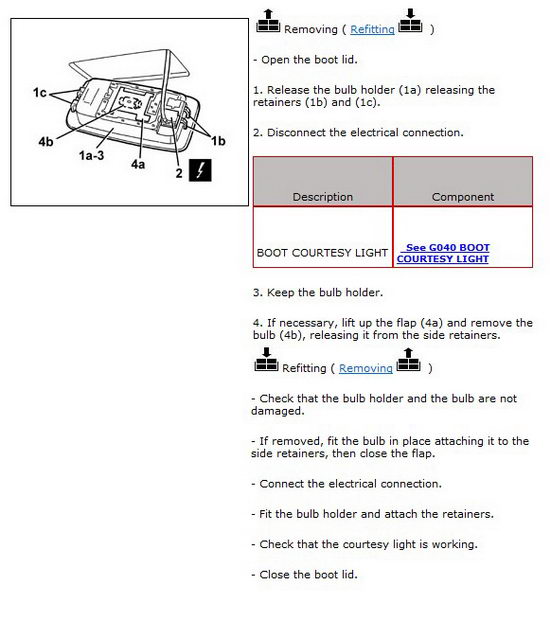
The boot light makes use of the final 42mm Festoon bulb (4b in diagram) and is located behind a simple clip on housing (1c & 1b in diagram). The eLearn guide below shows how to remove this:


Really useful guide, doing mine piecemeal, so coming in handy!
Thanks for this useful guide! I’m working on my SW right now. Please note that for a SW you need 2 more Festoon bulbs for the sides of the boot. 42 mm won’t fit, you will need 36 mm festoon bulbs. Greetings from Holland!
Thanks for the guidance. The eLearn guide talks about using a ‘special tool’ to remove the lamp housing from the roof lining, but no details on what that tool is.
Are you able to provide some more information please?
I use “bojo Bars” or “trim pry bars”. They are essentially small plastic prying tools that dont damage the trim. all available from your usual stockists